 |
| Princess S! |
I had a LOT of fun making this dress. The smile on my daughter's face is my well-deserved trophy!! The amulet was bought from JCPenney. She enjoyed twirling & singing the Sofia intro song and watching back-to-back episodes of the show on Netflix.
So what do you need to make this beautiful dress?
- 1 yard of poly-satin fabric in Violet
- 1/2 yard of poly-satin fabric in White
- 1 yard of white lace
- 1 yard of pearl trim
- Matching zipper and multi-purpose thread
- Heat n bond ultrahold iron-on adhesive sheets (not pictured)
- Walking foot (not pictured) This made my job easy peasy!
Bodice & Sleeves:
From this point on, the fabric is going to look different because of the low lighting in the basement (my sewing den). But I promise it is the same beautiful Violet!
- This is an unlined bodice. Any existing pattern that you have will work. I used one that I had drafted for Sweet's summer dresses. It has one front piece cut on fold and two back pieces not on fold.
- For the sleeves, I took my self-drafted sleeve pattern and exaggerated the bell portion (so that you can gather a lot) to make poofy sleeves.
- Before sewing up we'd first need to add the lace trim to the front bodice.
- After adding the lace, I went ahead and sewed up the bodice (including the sleeves) as one would normally do. I finished the neck opening and sleeve opening with a hem. I tried the bodice on my daughter to check for adjustments. My daughter was super-excited at this point! Then I added the zipper closure to the back.
- Next comes the beautiful pearl trim. I hand sewed this to the front bodice and the neckline with the violet thread. Oops! in my excitement I forgot to take pictures for this step.
Here is the finished almost finished bodice after adding sleeves.
Skirt
The original skirt has a white in-skirt and a scalloped violet outer skirt with emblems.
But I kept things simple by omitting the in-skirt.
Main skirt
- I cut out 2 rectangles with the Violet satin fabric of dimensions 17.5" (L) x 39" (W).
- Then I made a template for the scallop with dimensions 4.5" deep ad 13" at the widest part.
- I used the template to cut each rectangle into 3 scallops along the long edge.
This will give 6 scallops in total.
Emblem
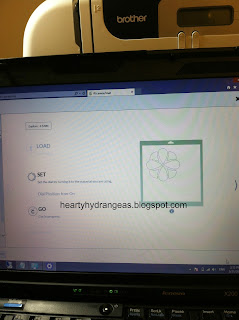
- I created the emblem image using Adobe Photoshop and imported it into Cricut Explore workspace. Each emblem was around 4.5" in diameter.
- I prepped the white satin fabric by ironing on the Heat n Bond adhesive sheet to the dull side. Then I placed the prepped satin (12" x 12") on the Cricut mat and cut out 6 emblems.
- I assembled the pieces for each emblem and ironed them on to each scallop of the skirt.
If you've reached this step, take a deep breath! All the elaborate part is done!!!!!
Assembling the dress
- Sew up the two rectangles (right sides together) along the short edges to form a tube.
- Hem the bottom using a narrow hem to prevent the satin from fraying.
- Sew a basting stitch along the top edge and gather the skirt by gently pulling on the thread.
- Sew the skirt to the bodice (pin, pin and pin some more).
- All done!!!!!!!!!!!! Admire your work one more time. Enjoy the slippery satin and the fullness of the skirt!
- Run upstairs and try it on your princess!
- Prepare for the unexpected - the ultimate stress test shown below!
 |
| Princess playing soccer! |


No comments:
Post a Comment
Thanks for stopping by Hearty Hydrangeas blog! I welcome your feedback.